Doodle Shooter Maps
A closer look at Doodle District and Doodle Jungle.
Doodle District and Doodle Jungle are the two maps described in the game brief. Both belong to the same notebook-style shooter. The drawings below are editorial illustrations, not screenshots or exact navigation maps.
Doodle District
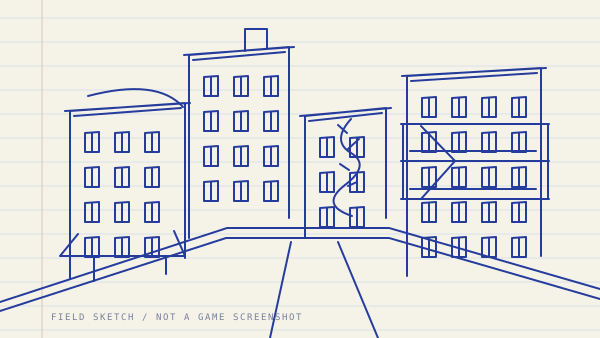
The first map is a blue-ink city of streets, rooftops and fire escapes. The vertical scenery fits the game’s movement tools: you can leave street level rather than staying in one firing lane.
Think in routes
Look for a way up, an open line to grapple toward, and a place to land. Practice without the pressure of online opponents. A route is only useful if you can repeat it while controlling your aim.
Find a route from street level
Use the District drawing to identify three kinds of feature: the open street in front, the roof edges above it and the fire escape on the right. Their arrangement is illustrative. In the game, first find an open stretch of street beside a building, then look up for an exposed roof edge. Choose a landing surface you can actually see rather than a hidden roof beyond the skyline. Walk toward the wall with W, turn to check the street behind you, and keep that ground-level space as your fallback if the climb fails.
Plan the climb as two short moves: street to an accessible upper surface, then that surface to the next roof. Before leaving the first landing, face the second one and check for a wall between you and the intended anchor. If you cannot see the next landing, move along the roof until it comes into view. This gives you a visible destination for each jump rather than committing to a blind crossing.
Aim the grapple at an exposed wall or roof edge
Face a building surface above the landing you want and aim at its visible edge or upper wall. Tap Q or E to fire the grapple. Once the rope attaches, hold the grapple input to reel toward the anchor, then press Space to launch from the rope. The original game’s controls explicitly describe this sequence. A hook fired into open sky has no building surface to attach to; lower your aim onto the wall instead of repeatedly firing above it.
Keep the building corner out of the rope’s path. If you are standing around the side of the target wall, step into a position where the anchor is directly visible before firing. Also check that an enemy is not covering your aim: the original game can grapple enemies, which pulls the enemy rather than creating the fixed anchor needed for a roof crossing. Re-aim onto the building if your intended climb turns into an enemy pull.
Choose a roof you can enter and leave
No named entry roof has been verified for this guide. Choose an entry roof by what is visible in your current run: its near edge, some flat space beyond that edge and a second way off it. Do not choose the tallest roof merely because it looks prominent in the drawing. From the street, aim above the near edge, attach the rope and reel upward. Launch with Space only when you have lined up a landing beyond the lip rather than directly against the vertical wall.
If the climb stalls below the edge, return to the open street you identified before starting and choose a lower surface. When airborne next to a wall, Space can trigger a wall jump; face the landing you want before trying that input. Roof names, entry coordinates and the best opening route still need an in-game test. The drawing cannot supply those measurements.
Leave a corner when enemies close in
If enemies approach along the street while a wall blocks your rear, turn toward the open side before moving. Use W with Shift to move out along that opening, or C / Ctrl while grounded to slide through a clear stretch. Check the exit before pressing the slide input; sliding toward the wall that trapped you does not create a passage. If the ground route is crowded and a building anchor is visible above the open side, use the grapple to change height instead.
If a rope pulls you into a building corner, press the grapple input again to detach, face open space and move away from the corner before choosing another anchor. Space while attached also launches and releases the rope, so use it when the direction ahead is clear. Avoid treating a jump into an unseen alley or off the map boundary as an escape route.
Doodle Jungle
Doodle Jungle is the second map, described in the game as canopies, vines and a lost temple. It is denser and more enclosed than the District, which makes the grapple and wall jump the fastest way through. Map selection can differ between the original game and the embedded copy on this site: an embedded copy may open with the first map only. Check the original game for the current map list and how to switch.
Find a path around the temple
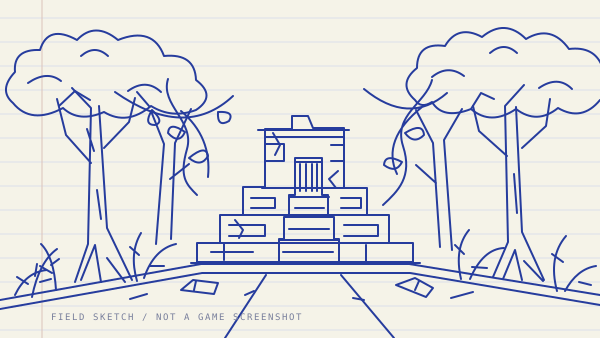
The Jungle drawing places a stepped ruin between two groups of trees. Use those features as visual categories, not directions from a confirmed spawn point. In the game, find a piece of open ground from which you can see a solid wall or raised landing. Trace the ground path to that surface with your eyes before moving. If foliage hides the destination, walk sideways with A or D until the wall and the space beside it are visible.
Choose an approach that leaves room to turn back. Before rounding a ruin’s corner, face the gap beside it and check whether you can see ground on the other side. If you cannot, stop short of the corner and inspect it from a wider angle. That is a concrete route check you can perform in the current run without assuming the illustration matches the game’s layout.
Hook visible geometry, not an assumed vine
A drawn vine or canopy does not prove that the corresponding object is a usable grapple anchor. Aim at a visible solid surface in the game, such as an exposed ruin wall, and tap Q or E. Confirm that the rope attaches before committing to the crossing. Hold to reel, then use Space to launch toward the landing you have already identified. If no hook attaches, move to a position with a clearer view and try a different visible surface.
Keep your intended anchor in view while approaching it. A wall between you and the anchor can interrupt the rope, so move around the obstruction before firing rather than trying to pull through it. If your aim is covered by an enemy, shift it onto the solid surface. The Jungle’s exact usable vines, canopy surfaces and grapple points have not been playtested for this guide.
Enter a raised surface from its visible side
The illustration shows temple steps, not a verified rooftop route. Treat an actual ruin ledge as a possible entry only after you can see a flat landing behind it. Approach from the side with the clearest view of that landing. If steps are present in your version, first try reaching the lower surface on foot; if a wall blocks access, aim the grapple above the ledge and check the attachment before reeling upward.
Turn toward your next landing before launching from the rope. If the first ledge offers no visible way onward, return to the approach instead of crossing blindly into the canopy. A tested temple entry, roof-to-canopy connection and named starting platform are still pending. This checklist explains what to inspect before entering a raised surface; it does not claim a particular Jungle shortcut has been confirmed.
Escape a narrow gap or a crowded landing
When a tree, wall or ruin edge blocks your movement, release W and turn to inspect the sides rather than continuing to press into it. Try A or D toward the side where open ground is visible. Once out of the gap, face that space and move into it before sprinting. If enemies are closing in, identify the open side first, then slide on the ground with C / Ctrl or grapple toward a visible anchor above that side.
If you are airborne against a solid wall, face a clear landing and try Space for a wall jump. If you are still attached to a rope, Space launches from the grapple instead. Check which state you are in before expecting the same key to produce a wall jump. When no clear anchor or landing is visible, take the known ground path back around the obstruction instead of firing blindly through foliage.
Movement connects the maps
Learn slide, wall-jump and grapple inputs in the controls guide, then return to play Doodle Shooter and practice your route. For online play, follow the multiplayer guide to the original site.
The movement inputs above are checked against the original Doodle Shooter game. The route suggestions are conditional checks to use in your current run; named rooftops, exact grapple points and complete map routes remain untested.